02
Portable Braille Embosser
ROLE: DESIGN LEAD, PROGRAMMER
August 2021 - Present
Project designed with Arduino and Fusion
Project completed in Cornell University with Kehui Guo, Ingrid Zhu
Instructor: Professor Cristobal Cheyre Forestier
ABOUT THE PROJECT
A Portable braille label printer that shortens the communication gap with those who are visually impaired.
This portable braille embosser will translate English text into braille and print out tags for blind or visually impaired people.
01
Introduction
Braille is a code system in many languages that visually impaired people can write and read with their fingers.
Traditionally, people use a slate and stylus for writing. The stylus will be used to create individual braille dots onto the slate that has many uniform cells. People with significant visual loss can easily read the indentation created by the stylus. Then, a Braillewriter is being produced so that people can type Braille more efficiently and accurately on the surface.
However, there are still not many portable braille printers available to bridge the gap between healthy readers and Braille readers, especially in everyday settings where people with visual loss need to interact with a variety of objects and communicate with others.

02
Domain Research
EXISTING BRAILLE EMBOSSER
Braille is traditionally written with a set of slate and stylus or with a Braille writer. Each Braille character is organized in 3x2 rectangular blocks that have raised dots aligned in the cells. Traditional electronic Braille printers and embossers relied on machines to create tactile dots on sturdy paper, aiming for mass production and publication. From the Index Classic Braille Printer to Juliet Classic, the model of the Braille embosser has been developed to become more user-friendly and compatible with different digital devices [10].

Modern manufacturers now delve into the design of portable devices for Braille printing to facilitate inclusiveness within a broader community. Vrailler is a DIY Braille label kit project from California to print Braille texts and create label stickers. The main strength of Vrailler compared to traditional Braille printers is its portability and learnability [9]. While the Vraille embosser contributes to individuals and Braille education for practical reasons, the mechanism of this product is quite troublesome. The user manually inserting pins into the slate without any automatic proofreading and spell check system increases the likelihood of producing inaccurate content. Additionally, since Vrailler does not contain any electronic component, the efficiency of writing and printing becomes uncertain. Therefore, a new project should be proposed and be built based on the Vraille sticky label slate with the integration of an automatic embossing unit and translation software.
INNOVATIVE MATERIALS
Other materials and printing techniques were also explored as alternatives, including touchable ink [2], 3d printing pen [6], thermal printer, and label printer [1]. Touchable ink works similarly to glue guns and 3d printing pens, allowing paper printers to leave highly visible marks on the paper. However, these devices are less feasible to prototype due to the high temperature needed for melting and printing with accuracy. Fully automated sewing machines are efficient and have a similar embossing mechanism [4]. Nevertheless, they are pricey and heavy, making them incompatible with the design goal [7]. Lastly, portable thermal printers and label printers are reviewed for their portability [5]. Although the labels may fade over time, the structure of the printer provides high mobility and usability. If the labels can be created with indentation, then the features of thermal and label printers will be ideal for the proposed project.

MANUFACTURING TECHNIQUES
This project's critical components of a portable Braille printer will be categorized into software development and hardware implementation.

The physical components of the project contain a printer head, which is attached to a handle that will print the Braille script column by column. A conveyor belt will be constructed for the delivery of the tape. The speed of the conveyor belt will be set by default to match each movement of the printer head. The system of this project will be mostly automated with a key printer head introduced in a research journal that is directly related to the mechanism of Braille embossers [8].

The software will be programmed for the system to translate the input text into Braille equivalent and electronic signals which will be sent to the hardware.
We collected and analyzed ten previous implementations with the existing Braille writing systems and label-printing mechanisms and then reviewed the literature regarding the specific techniques of innovating a low-cost Braille embosser.
02
Primary features & Goals

1
PRINT BRAILLE
The machine will be able to print out Braille onto a surface. The Braille printer will have a set of six needles, which can be used to print on thick tape. The user can take out the tape and stick it anywhere they want so that a person with a disability can read the Braille by touching and feeling the indent on the stickers.

2
TRANSLATE
The machine will read the user input and translate it into Braille. Users can type English letters or words into the machine through a text editor, which can be on the machine itself or linked to an electronic device. Then the machine will translate that input text into Braille.

3
INTERCHANGABLE SURFACE
The tape that will be used in the machine is changeable. The machine can print on different types of the physical interface by changing the tapes.

4
CUSTOM SIZE
The machine will have a tape cutter which helps the user easily cut any type of tape.
Build an interactive and assistive technology for visually impaired USERS and users with normal vision.
SIMPLE & CONVINENT
Maintain both the simplicity of text input and translation of conventional Braille printing machines and the expediency of sticky label printers and embossing printer heads.
LABELS
Produce Braille labels with stickers or Braille scripts with parchment papers given the user’s input from the software.
FULLY AUTOMATED
Have the printer system fully automated, integrating an x-y bearing structure driven by stepper motors with an embossing head that moves in accordance with the serial communication of the position vectors of each Braille dot.
AESTHETIC & PORTABLE
The interface and physical structure of the Braille printer should be designed to meet ideal aesthetic requirements and a moderate level of portability.
03
Printer Head
Two components need to be implemented in this module connecting to the microcontroller for the printer head to conduct embossment work successfully and efficiently. First of all, a hammer consisting of six needles aligned in the shape of a 3x2 rectangle should be built around the bottom of the head with each stylus labeled from 1 to 6 that communicates with the microcontroller. The horizontal axis structure designed in the framework module will help move the entire head 1 unit to the right. Yet another movement of position is required for the printer head to function correctly and be more user-friendly; that is, additional z-axis needs to be built within the printer head structure. Such a structure allows the printer to move back and forth and facilitates the text wrapping around with a fixed-line space.

A six-stylus printer head prototype was built to test its functionality. A container structure is built around and above the stylus to store the servo motor, gear train, and circuits. However, the prototype worked fine only at a low level due to the missing physical parts and inaccurate estimation of the size of parts that will be used to control the embossing stylus. The final design implemented with physical parts will be too clumsy and too heavy for the framework to bear, and the power required to manipulate multiple needles will be too large to balance. Therefore, an alternative prototype was explored and designed to replace the six-stylus model. Aiming at preserving the most flexibility and efficiency, a one-stylus prototype was tested. The one-stylus printer head model suits perfectly with the rest of the design, and more importantly, it takes good advantage of the z-axis that is built right on top of it.

Taking all the testing cases and experiments into evaluation, a one-stylus printer head will be more feasible to implement given that the size of the entire printer head is designed to be relatively small and light-weighted. The stylus is going to be driven by a 5-volt mini push pull solenoid valve. In this case, the stylus must be able to move by actuating itself on the z-axis. The goal is to have the solenoid move upwards and downwards to mark each dot. After a line is finished, the printer head (along with the needle) should move posteriorly on a larger scale to create a new line and finally move anteriorly back to the default position.
The solenoid valve is connected to the Analog pin#27/A10 on the microcontroller and placed inside the center platform of the bearing structure.

1kΩ Resistor
Mini Push Pull Solenoid Valve 5V
Diode
Adafruit HUZZAH32 - ESP32 Feather
Power Transistor
04
Bearing Structure and framework
The bearing structures of the framework are responsible for supporting the movement of the printer head in both horizontal and vertical directions on a 2-D plane.
INITIAL EXPLORATION

X-Y Axis Lifting Structure
This is derived from the conventional printer and embossing machine that has a x-axis and a y-axis with bearing parts that connect to the printer head. With this structure, the printer head will also be able to move horizontally and vertically at a moderate speed.

Scissor Lifting Structure
It is commonly seen on elevators and forklifts. It has the shape of letter “X” and a scissor cross and is usually built at the bottom of a machine to support the platform on top of it. For this project, the scissor lifting will be turned upside down and hang upon the ceiling of the machine so that the printer head can be actuated downwards.
The two lifting structures are tested with the same one-stylus printer head respectively. The performance of the scissor lift did not satisfy the design expectation because once the printer head is attached to it, the total weight of the printer head, sensor tools, and the servo motor for itself will be centered on a single point which makes it inconvenient for circuit connections. The structure can be too complex and out of balance if the area of the platform is increased for more stability. Turning to the second conventional lifting and moving structure, it connects the framework and the printer head with multiple linear bearing rods and platforms. This design ensures that the printer can be moved in the four directions stably and smoothly. After evaluating the performance of the two prototypes, a 2-D (flattened) version of the conventional x-axis and y-axis model is selected in the final design. This design will render the most flexibility and space for the motors and the printer head. It has four fixed supporting nodes for the framework and stepper motors and four rods to maintain the balance and drive the centered solenoid bearing platform with a pulley belt.
SECOND VERSION

The first version of the final x-y plotter prototype design employs a differential x-y plotter model. There are a total of 13 parts and joints that are printed out with a 3-D printer. The central platform is made up of two separate body pieces connected by screws. The bodies have patterns that make space for the rods and belts to traverse across three supporting structures and the stepper motor. Two wings and motor caps are attached to the rods and the motors so that the motors can drive the entire system with one belt. The main disadvantage of this differential x-y plotter is that it is not only complex to build but also difficult to control the motors to carry out precise movement given the size of Braille cells. Another concern is the potential constraint of a giant and unbalanced motor unit and central platform that it imposed on the overall designed structure. The framework of this plotter is also deviated from the design goal of having a portable and convenient Braille printer.
FINAL DESIGN

Taking the drawbacks from the last prototype into consideration, a new design of the bearing structure is designed to implement the primary design goal and a final prototype with improved efficiency and portability. The customized design of the x-y plotter preserves the x axis of the differential x-y plotter to drive the pulley belt and the motor. As shown in the sketches below, the central platform which holds the solenoid printer head and two linear motion bearing joints are suspended in the midair by two liner rods. One of the ends is connected to a fixed structure that is attached to the wall of the printer machine. Another end of the rods is connected to the stepper motor cap. The cubic concave areas on the sideways supporting structure are used to store the pulley wheels and pulley belt to drive the platform to move from the front to the back. The y axis is divided into two linear rods with one of the rods fixed to the wall to hang up the x axis and the motor attached to it and another rod connected to the stepper motor to drive the entire x component to move from left to write when printing out Braille characters.

Adafruit HUZZAH32 - ESP32 Feather
Stepper Motor
100μF Capacitor
Stepper Motor Driver Carrier
The parts of the customized x-y plotter are first designed with free-hand sketches and later aided by Fusion software to launch the design onto a 3-D printer. Next, the stepper motors are connected to the microcontroller with the schematic design provided above. When the motor is activated by the program, it drives the central platform which is steadily connected to the pulley belt.
05
Translation software
Because the one-stylus printer head is chosen to be the final implementation model, there is no need to write programs for each needle. Instead of programming the action of the printer head with the numerical label of the needles from 1 to 6 (ex. A-#1, B-#1#3), our initial design is to have the software module encoding the Braille characters into movement vectors ahead of time (ex. A-down, B-down, up, back, down, up). Each movement, regardless of the direction, will be set to 1 unit length according to the standard of Braille writing, and each time when the stylus finishes one dotted indentation, it will be lifted up before moving to the next point. The mechanism is similar to a morse code translator in a broad sense that each character will be encoded with four signals and sent to the microcontroller from the software.

1
4
2
5
3
6
The Braille Cell
After examining the initial design, the software architecture is redesigned to make the movement of motors integrated more seamlessly into the printing process. Previously, each English letter was coded by its corresponding Braille character and the movement vector. For the final prototype, each Braille dot’s movement is planned to be defined as functions in the beginning of the program. For instance, the Braille cell is organized into a 2x3 structure and each cell can be represented with a number, having cell #1 being the dot on the top left, cell #2 being the middle left, cell #4 being the top right, and etc. For cell #1, the program will just order the solenoid to be set as high and then low to make one embossing happen in the origin. For cell #2, the program will first initiate the y-axis so it moves down one unit, and then start the embossing movement, and return to the initial place by moving up one unit. For cell #5, the program will first move one unit in the x-axis and move down unit in the y-axis to make the embossing, and then it will move up (y-axis) and move left (x-axis) to return to the origin. Such setup allows us to systematically plot each Braille cell, which will be used later in the embossing of the 26 alphabets.
Each alphabet will be coded in a way that it has both its full Braille character to be displayed on the LCD screen and also the corresponding Braille cell number. For instance, letter “d” has a Braille character of “⠙”, and it will also call the function for printing Braille cell #1, #4, and #5. Since every embossing action will be followed with a movement to calibrate the position to the origin, which is on the top left cell, we can then program the movement for an empty space. When an empty space is typed in the serial input, it will move the printer head (solenoid position) three units to the right side with the y-axis so that there is one unit between the previous Braille letter and the next one.
06
PROTOTYPE ITERATION
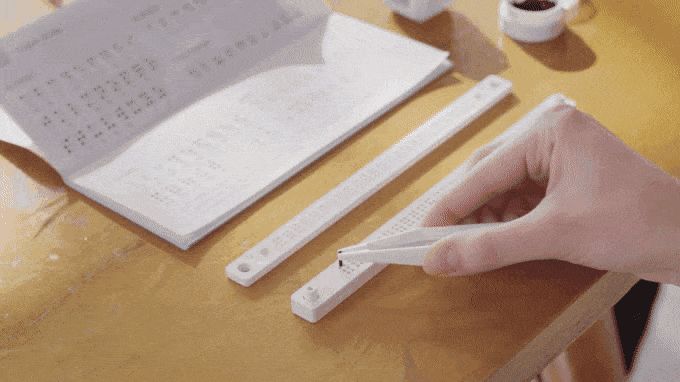
PAPER & LEGO PROTOTYPE
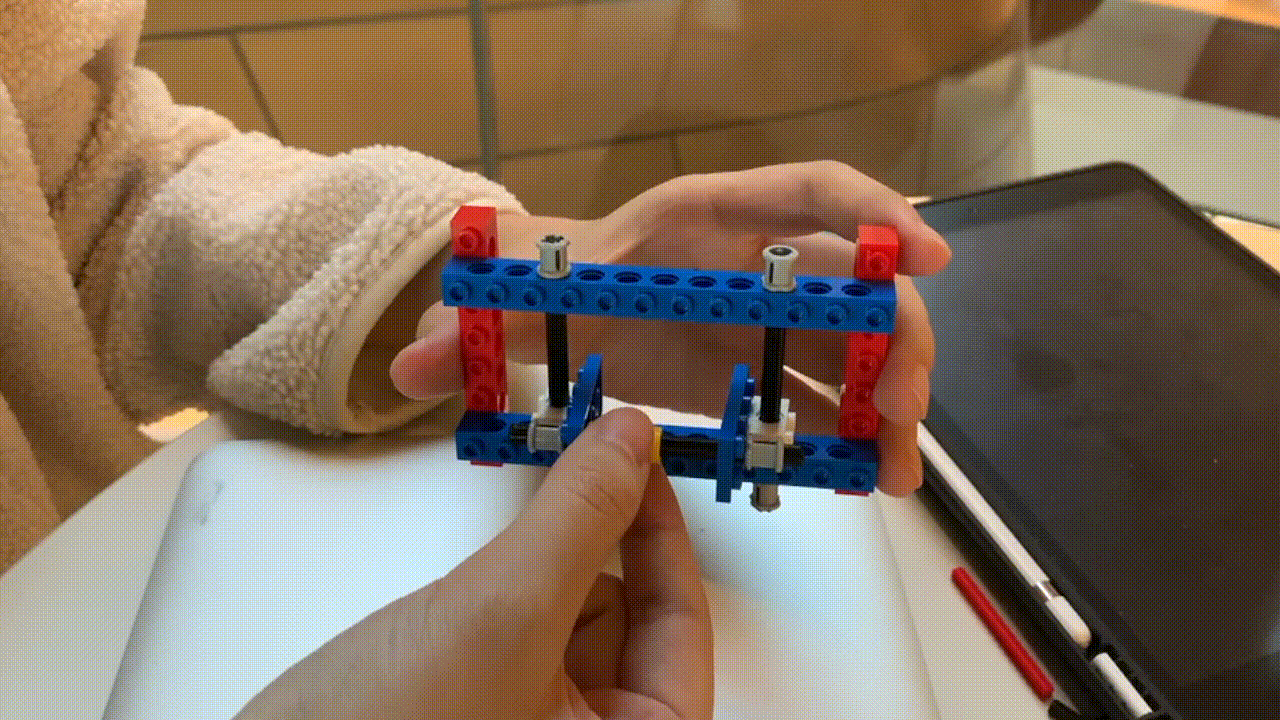
Printer Head Moving Structure
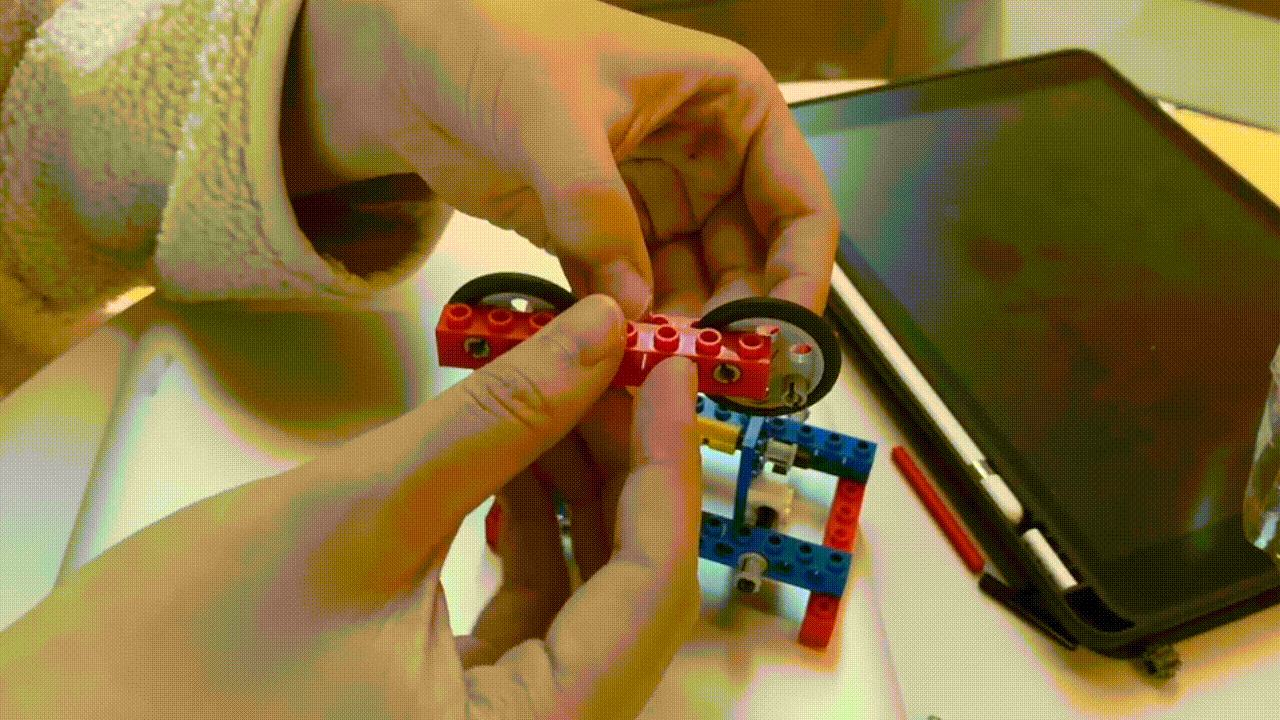
Printer Head Printing Process

Framework
CARDBOARD PROTOTYPE
Scissor Lift Structure
Traditional Rail Structure
Printer Head / Embosser
FUNCTIONAL PROTOTYPE
FINAL PROTOTYPE SCHEME
First and foremost thing that needs to be done shortly to completely implement the primary design is to control the motors with carefully computed speed and distance so that the motor and printer head can be integrated along with the software programmed for English-Braille-Distance translation. Secondly, the stylus will need to be replaced with a metallic needle that can provide the most strength for indentation. Finally, each customized part will need to be redesigned and printed based on an accurate measurement of the overall structure. There is also an additional feature of an LCD screen display of the translation results of Braille that need to be integrated into the main design. Last but not the least, the rods used in the initial design are too long for a portable machine, so several orders of bearing rods and extra parts need to be placed for the final product.
07
References
[1]
Brother P-touch cube PTP300BT | Wireless Label Maker. (n.d.). Retrieved from https://www.brother-usa.com/products/ptp300bt.
[2]
Cheap "Touchable Ink" Brings Everything to Life for Visually Impaired People. Tech in Asia. (n.d.). Retrieved from https://www.techinasia.com/touchable-ink-for-blind-partially-sighted-people.
[3]
Gierenz, G., & Karmann, W. (2001). Adhesives and Adhesive Tapes. Wiley-VCH.
[4]
Henderson Sewing. (n.d.). Retrieved from https://hendersonsewing.com/page.asp?p_key=B1F3D4F2D10346119EBE96CC0AD409A2.
[5]
How Does a Thermal Printer Work? Everything you Need to Know. CDW. (n.d.). Retrieved from https://www.cdw.com/content/cdw/en/articles/hardware/what-is-a-thermal-printer.html.
[6]
Imeri, A., Russell, N., Rust, J., Sahin, S., Fidan, I., & Jack, H. (n.d.). Board # 127 : MAKER: 3D Pen Utilization in 3D Printing Practices. 2017 ASEE Annual Conference & Exposition Proceedings. https://doi.org/10.18260/1-2--27723
[7]
Noe, R. (2017, August 15). The SEWBOT, a Fully Automated Sewing Machine, Is Cool. It’s Also Bad News for Garment Workers. Core77. Retrieved from https://www.core77.com/posts/68389/The-Sewbot-a-Fully-Automated-Sewing-Machine-is-Cool-Its-Also-Bad-News-for-Garment-Workers.
[8]
Velázquez, R., Arroyo, J., Boukallel, M., & Giannoccaro, N. I. (2020). Design and Implementation of a Low-Cost Printer Head For Embossing Braille Dots on Paper. International Journal of Emerging Trends in Engineering Research, 8(9), 6183–6190. https://doi.org/10.30534/ijeter/2020/206892020
[9]
Vrailler: Affordable DIY Braille Label Kit to Learn Empathy. Kickstarter. (2019, August 29). Retrieved from https://www.kickstarter.com/projects/vrailler/vrailler-the-portable-and-easy-to-use-Braille-prin.
[10]
What is Braille? The American Foundation for the Blind. (n.d.). Retrieved from https://www.afb.org/blindness-and-low-vision/braille/what-braille.